Back to Contents Page

Palm Rest

Dell™ Inspiron™ 1525/1526 Service Manual


Removing the Palm Rest

CAUTION: Before you begin the following procedure, follow the safety instructions in the Product Information Guide.
  1. Follow the instructions in Before You Begin.

  2. Remove the center control cover (see Removing the Center Control Cover).

  3. Remove the keyboard (see Removing the Keyboard).

  4. Remove the internal card with Bluetooth wireless technology, if installed (see Removing the Internal Card With Bluetooth® Wireless Technology).

NOTE: It is not necessary to remove the Bluetooth cable connector from the system board connector.
  1. Disconnect the button board cable from the system board.

  2. Disconnect the speaker cable from the system board.

  3. Remove the display assembly (see Removing the Display Assembly).

  4. Remove the nine screws from the bottom of the computer.

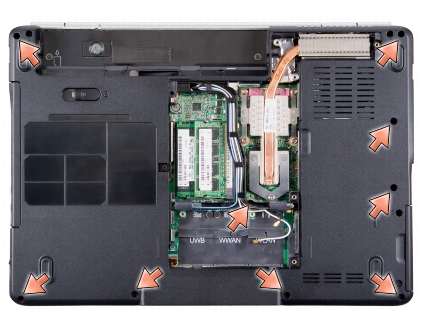
NOTE: The screw locations may vary slightly from the image shown below.

  1. Turn the computer over and remove the two screws securing the top of the palm rest.

  2. Disconnect the touch pad connector and the device status lights LED connector from the system board.

NOTICE: Do not use force to separate the palm rest from the computer. If you encounter resistance, gently flex or apply pressure to the palm rest, or move along the edge, working away from the area of resistance, until the palm rest is free.
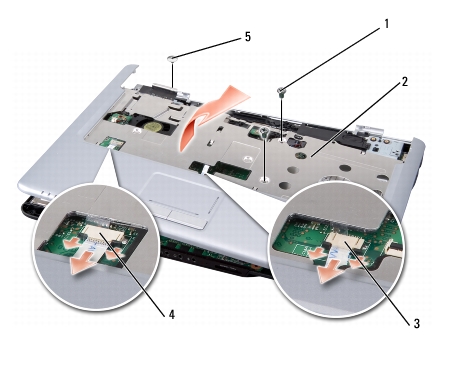
1

screws (2)

2

palm rest

3

touch pad connector

4

device status lights LED connector

5

display hinge screw


  1. Moving from left to right, carefully lift the palm rest along the rear edge, near the hinge brackets, then gently lift the palm rest to remove it from the computer.

Replacing the Palm Rest

CAUTION: Before you begin the following procedure, follow the safety instructions in the Product Information Guide.
  1. Align the palm rest with the base of the computer and gently snap it into place.

  2. Connect the touch pad connector and the device status lights LED connector to the system board.

  3. Replace the two screws on the top of the palm rest.

  4. Turn the computer over and replace the nine screws on the bottom of the computer to secure the palm rest.


Back to Contents Page